Roof Replacement in the USA
Roof replacement begins when repairs can no longer address water intrusion through multiple failed layers. Our technicians first count the existing shingle courses to determine if a tear-off is necessary rather than an overlay that traps moisture between old and new materials. They measure rafter spacing and note any sagging that signals deck deflection under load.
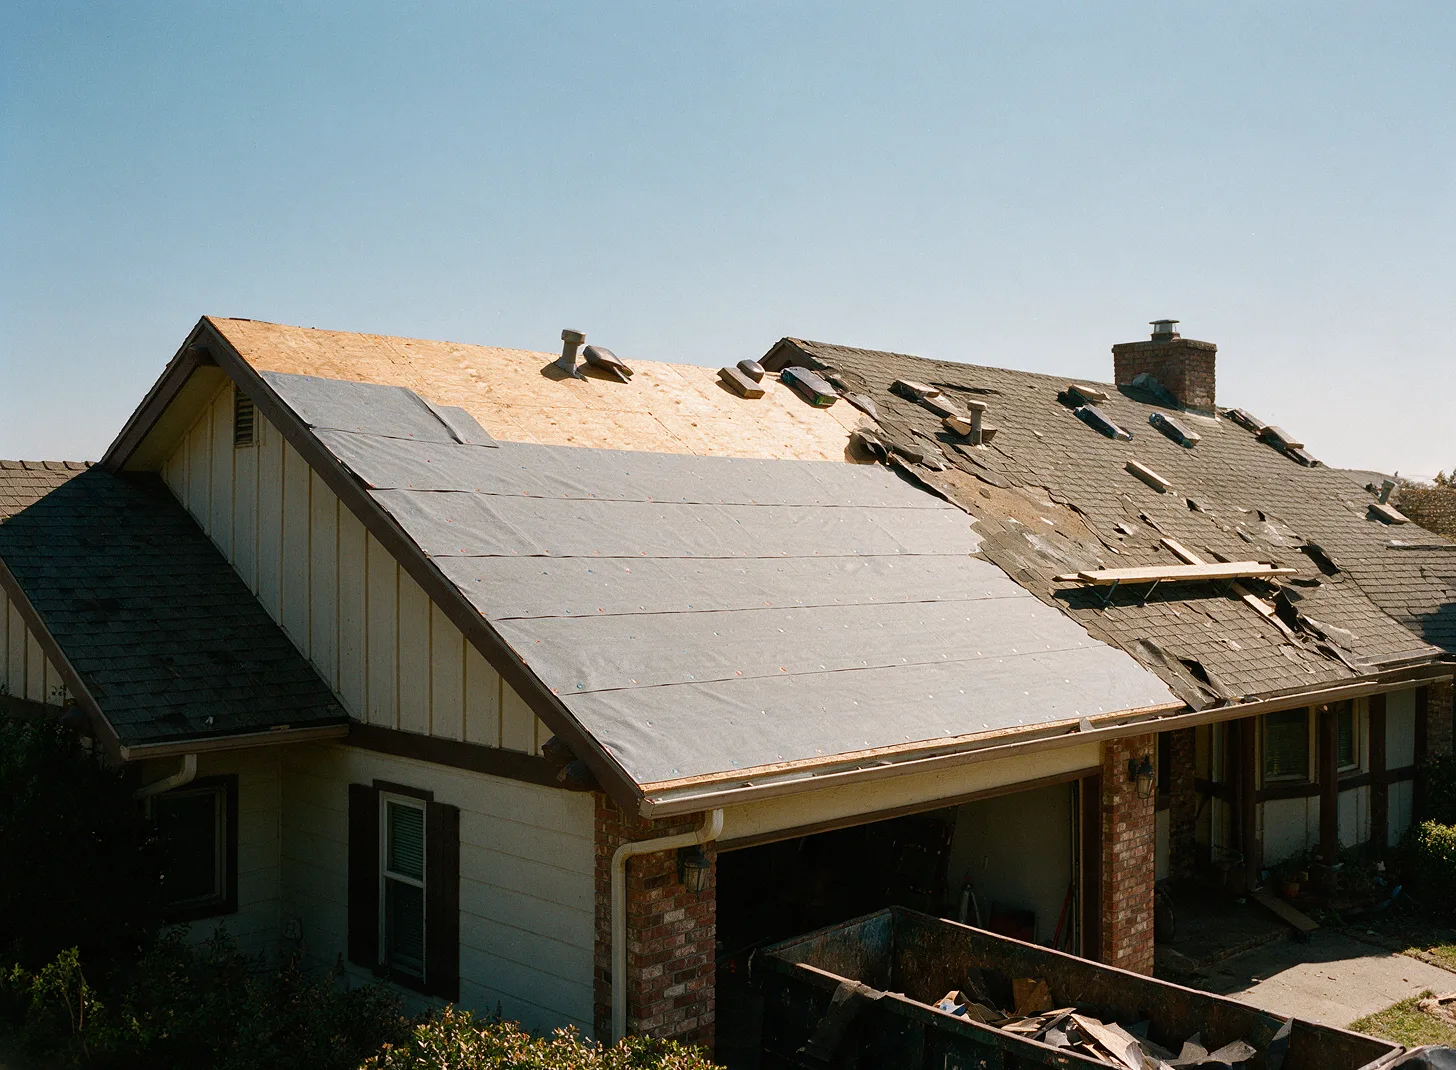
Once the decision is made, the crew removes all layers down to the decking. This exposes the condition of plywood or oriented strand board so that rotted sections can be cut out and replaced with matching thickness material before new underlayment is rolled out from eave to ridge. Certified Roofing Contractors covers roof replacement jobs in the USA.
Indicators That Point to Full Roof Replacement
- Granule loss that reveals the fiberglass mat on more than one slope
- Shingle tabs curling upward at the edges and creating entry points for wind-driven rain
- Daylight visible through decking from inside the attic along multiple rafter bays
- Water stains that reappear after targeted leak repairs around plumbing vents and chimneys
- Buckling or waves in the roof surface caused by multiple layers trapping heat and moisture
Conditions That Lead Technicians to Recommend Replacement
When three or more layers of shingles are already present the added weight stresses rafters and reduces the effectiveness of new fasteners. Technicians measure the combined thickness at the eaves and ridge to confirm the structure can accept another layer or requires complete removal down to the deck.
Ice and water shield applied only at eaves in previous work often fails to cover the full length of valleys where two slopes meet. During inspection they pull back shingles at these intersections to check for rot that has spread along the plywood seams.
Asphalt shingles that have reached the end of their service life show widespread cracking along the sealant strip. This allows the mat to absorb water and shed granules at an accelerated rate, making spot repairs ineffective.
Measurements and Checks Performed During Evaluation
Technicians walk every slope with a moisture meter and record readings at deck seams, around skylights, and beneath ridge vents. Readings above twenty percent indicate trapped moisture that must be addressed by removing affected deck sections before new materials are installed.
They also measure the distance from the top of the wall to the ridge to calculate ventilation ratios. Inadequate intake at the soffits combined with exhaust at the ridge can cause condensation on the underside of the deck even after new shingles are applied.
Flashing details at step walls and dormers are photographed and measured for length and overlap. Short or missing counter-flashing allows water to travel behind the siding and reach interior finishes, which replacement addresses by extending metal up the wall and integrating it with new step flashing.
Material Choices and Installation Sequence
After tear-off the crew installs synthetic underlayment across the entire deck rather than felt because it resists tearing during high winds and maintains a consistent water barrier even if shingles are later damaged. Self-adhered ice and water shield is applied in all valleys and along the eaves to at least three feet inside the exterior wall line.
Architectural shingles are then laid with a six-inch offset between courses so that the end joints of one course do not align with those above or below. This stagger prevents water from finding a straight path through the seams to the underlayment.
Ridge vent sections are secured over a continuous slot cut along the peak. The vent allows moist air to exit while the new cap shingles overlap the vent flanges to keep precipitation out of the attic space.
Actions Homeowners Can Take Before the Crew Arrives
Move vehicles and outdoor furniture away from the house perimeter so that debris can be loaded directly into trucks without crossing the lawn. Clear attic access points and remove stored items from the immediate area under the roof deck so technicians can inspect and replace sections without obstruction.
Document any interior ceiling stains with photographs and note the dates when water was first observed. This information helps the crew correlate leak locations with roof features during the tear-off and prevents disputes over preexisting interior damage.
Turn off power to any attic-mounted fans or whole-house ventilators. The crew will need to work near electrical boxes when installing new ridge venting and will restore power only after all penetrations are sealed.
Roof Replacement questions
How many layers of shingles can remain before replacement is required?
Two layers is the practical maximum before the combined weight and fastener grip become unreliable. Technicians count courses at the rake edge and check fastener pull-out resistance on the top layer to decide whether removal of all layers is necessary for proper fastening into solid decking.
What happens to the old shingles during removal?
All existing material is loaded into trailers lined with tarps so that granules and nails do not scatter. The crew uses magnetic sweepers on the ground and driveway after the last bundle is removed to collect stray fasteners that could damage tires.
Can the new roof color differ from the existing one?
Yes. Technicians bring sample strips of several shingle colors and place them against the siding and trim so the homeowner can see how each option appears under the actual sunlight angle at the property. Color selection occurs before the tear-off begins.
Will the crew work around skylights and solar panels?
Skylights are flashed with new step metal and counter-flashing integrated into the shingle courses. Solar panel mounts are temporarily removed where necessary so that underlayment and shingles can be installed beneath the attachment points before the panels are reinstalled and sealed.
Begin Your Roof Replacement Assessment
Contact Certified Roofing Contractors to schedule an inspection of your existing layers and deck condition.